This Guide is Obsolete and has been replaced by:
- Downgrade Rights to XP Pro from Windows 10 Pro Using a Virtual Machine
- Convert a Windows XP Pro OEM Physical Machine into a Windows XP Pro Virtual Machine (Host PC Windows 10 Pro OEM Downgrade Rights)
Contents
- Introduction
- Example Windows XP Physical Machine
- Installing VMware vCenter Converter and Making a System Image
- Installing VMware Player and Loading your Virtual Machine
- Disabling the Ethernet and other Unused Hardware
- Using the VM and Connecting to USB Hardware
- Using Serial Ports
Introduction
This guide will instruct you on converting a Windows 7 Professional OEM Physical Machine into a Virtual Machine using VMware vCentre Converter. The advantage of this is you retain all files, programs and settings after converting the physical machine to the virtual machine.
VMware vCentre Converter can be downloaded for free from VMware however you will need to make an online account to access the download:
https://www.vmware.com/uk/products/converter.html
You will also need VMware player:
https://www.vmware.com/uk/products/workstation-player.html
Normally when one converts a physical machine into a virtual machine they encounter Microsoft Product Activation issues. The solution touted on other guides is to purchase a Retail License… This is kind of hard to do as Microsoft don’t sell Windows XP Pro anymore.
In this guide we will use OEM Downgrade Rights and therefore need a host PC (new Dell, Lenovo, HP PC) with a Windows 10 Pro OEM License. The original PC (old PC) being converted should have a Windows XP Pro OEM License. In my case both PCs will be Dell Models.
Example Windows XP Physical Machine
For this example I have performed a clean install of Windows XP with Service Pack 3. As legacy software I am using the XP version of Epson Scanner software for an Epson V33. This is a good example as it can be used as a demonstration of connecting a Virtual Machine to specialised hardware. I will install Microsoft Works 9 as Legacy Software.
So as an example I can launch the Epson Scan program:

I can select Scan:

I can select ok to scan an image in this case a Dell Windows 7 Reinstallation DVD:

I can then scan by connecting to the hardware (Epson scanner):

And I now have the image saved in My Pictures:

I can open up Microsoft Works and save a document:

This gives a few documents to test with:

I can go to Start and then right click My Computer and then select Properties:

System Properties opens up. The product ID as shown is for Dell Windows XP Professional SP3:

Installing VMware vCentre Converter and Making a System Image
Double click the VMware vCenter Converter installer to launch it:

The installer will prepare:


Select next to begin the installation:

Select next again:

Accept the license agreement and select next again:

Select next again:

Select Local Installation and select Next again:

Join the customer experience improvement program if you want and select Next:

Select Install:


Opt to Run the Converter Standalone Client Now. Finish to end the installation:

Select Convert Machine…

Select "This Local Machine…":

You can select to "View Source Details…":

You can close this information dialogue:

Select next:

Select "VMware workstation or other VMware virtual machine":

Select "Browse":

Navigate to your external HDD and make a new folder to save your new VM:


Select next:

You will get some warnings you can look through them by selecting Edit:

In most situations nothing needs to be changed:


Select next:

Then select Finish:

Then wait for the VM image to be created:

You will be informed when the image created is completed:

You can then check the file size of the VM. Mine is very small as its a clean install with little files or software:

Passing Through the SLIC to the VM
It is recommended to copy your VM onto an internal SSD for best performance. Also this way you always have a backup on your external HDD that is untouched to fall back onto. Open up the folder:

We need to modify the VMware virtual machine configuration file to pass through the Dell SLIC from the Dell Windows 10 Pro OEM Host PC.

Right click the VM

Right click it and select open with… then Notepad:

To the bottom of the file we need to copy and paste four lines of code:
acpi.passthru.slic = "TRUE"

acpi.passthru.slicvendor = "TRUE"

SMBIOS.reflecthost = "TRUE"

bios440.filename = "Dell.rom"
Once you have done this select File and Save and close down notepad:

The Dell.rom must also be added to this folder:

Right click the VMware virtual configuration file:
Launch the VM by double clicking on the VMware virtual configuration file:
The VM will load for the first time:


There may be some warnings about devices not showing for example the host doesn't have a Floppy Drive and in this case I don't have a floppy image created. I'm not interested in the floppy drive so I will disable it later:

You will be asked about Downloading and Installing VMware Tools. These are the system drivers for the virtualised hardware. Select Download and Install:

VMware player will download the tools needed for Windows XP and continue to load Windows XP in the VM:


Once VMware tools have downloaded it will prompt you to install. Accept the UAC prompt on the host:

Any found new hardware dialogue boxes can be closed at this stage by selecting cancel:

Do not opt to restart your computer now and let the VMware tools load:


Select next:

Select typical and next:

Select install and wait for the installation of VMware tools:


Select Finish to complete the VMtools installation and follow the prompts to restart your computer:

Select yes to restart:

You will be logged out the VM. You'll then see the virtual BIOS and the VM will restart:


Now you should be able to resize the VM as a normal Window:

Drag it down:

Aerosnap it back to the top:

With the VM Tools graphics driver installed the guest VM will automatically readjust its size in accordance:

OEM Licensing 30 Day Trial
I have converted a physical machine with a Windows XP OEM install into a virtual machine. I can go to start and right click "My Computer" and select properties to get the product ID:

Because it is an OEM license that is non-tansferable (the product ID contains the words OEM) I will get a 30 day trial with constant nags for Microsoft Product Activation issues…

The best way to counter this is to add a custom ROM to the VM which has a SLIC which allows the SLP key to activate offline as normal. The VM can be Upgraded to a Retail or Corporate License (discussed below) but this requires an Upgrade Install which may reduce performance or break some third party software.
I can click this balloon to bring up the Microsoft Product Activation wizard:

Unfortunately I will not be able to activate this installation using the OEM Product Key. There is a Windows XP Product Key Change Tool utility which should allow one to change the OEM sku to retail. I don't have a Full retail product key to hand so haven't tested it.
If I continue using my Windows XP Installation for more than 30 days I will get the following. In order to do anything you must select "Yes" to log in and bring up the product activation wizard:

This screen will prompt you to activate but you will be unable to because its an OEM install and an OEM key can't be used in a VM:

Because the Windows XP Windows Explorer isn't running and because you aren't able to bring up task manager. The following workaround can be used. Press [Windows] and [ u ] to bring up narrator. Click the hyperlink in Microsoft Narrator:

This will bring up Internet Explorer. Select Ask me later if your asked to setup Internet Explorer:

In the address bar type in c:\ and press [Enter]:

You may get an error disregard it and any other Windows shown (don't close them otherwise you may be logged out):

You will only be able to use Windows XP for 5 minutes but its enough time to initiate the Upgrade Install which will be next mentioned.
Windows XP Pro Corporate/Retail Upgrade Install
This part of the guide requires Windows XP with SP4 Retail Media or Windows XP with SP4 Corporate Media with a Retail Key or a Corporate key respectively. Corporate keys are preferable as automatic offline Product Activation is applied. A Retail product key on the other hand will require Phone Activation. I will use a University Corporate license which has been updated with the Unofficial Service Pack 4. Service Pack 4 Installation Media is preferred for the Upgrade Install otherwise you'll get multiple warnings about the installation files being older than those currently installed.
To make Windows XP Service Pack 4 installation media from an older installation disc see my Slipstreaming Service Pack 3, Windows Media 11 into your Windows XP Installation Media using nlite. For Retail or Corporate installation media you can directly slipstream the Unofficial Service Pack 4. Note that you don't need to slipstream the older service packs, IE8 or WMP11 separately. The guide wasn't updated for OEM installation media as it broke OEM System Locked Preinstallation which isn't used for a Retail or Corporate Upgrade install.
Select player → Removable Devices then settings.

Select use .iso image file and browse for your installation .iso:

Select your Windows XP SP4 .iso and press Open:

Select OK:

The Windows XP Pro install setup should now launch. Select Install Windows XP:

Ensure the Installation Type is Upgrade and select Next:

Accept the License Agreement and select Next:

Enter your 25 digit Product Key and Select Next:

Since there is no Updated Setup Files past the Unofficial Service Pack 4 there is no point in opting to looking for updated Setup Files so select No, skip this step and then select Next:

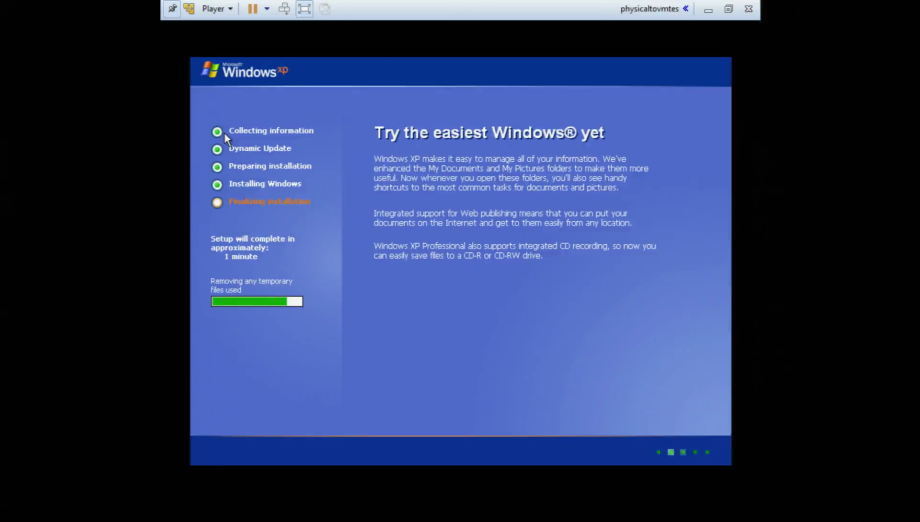
The rest of the install is automated and the VM will restart two times:


You will get to the Welcome to Microsoft Windows screen. Select Next:

There is again no point in turning on Automatic Updates as there are none. Select "Not Right Now" and select Next:

Again there is no point registering with Microsoft as Windows XP is at End of Life. Select Next:

Select Finish to complete the Upgrade Install:

You will now return to the new Windows XP SP4 Desktop:

Go to Start and right click My Computer and select Properties:
Now you will see there is no OEM in the Product ID. If you used a Corporate key there is nothing else required.

If you are using the Retail version of Windows XP then you’ll have to go through the pains of Microsoft Product Activation. Moreover its ill advised to connect the VM to the internet so phone activation is recommended. Go to Start → All Programs → Accessories → System Tools → Activate Windows:

Select Yes I want to telephone a customer Service Representative to Activate Windows:

Select your Location:

Then call the toll free number:

You’ll be on an automated call. You’ll have to input the horrendously long number into the phone. The automated phone will then give you an equally horrendously long number which you’ll have to input and then you can select next. You will get a Thank you and Windows will be activated.

Now that the Product Activation issues are sorted the VM can actually be used.
Disabling the Ethernet Connection and Other Unused Hardware
Since Windows XP reached End of Life over 2 years ago it should be considered as unsafe for Internet Usage. As a consequence its best used Offline.
I advise disabling any unwanted hardware such as the ethernet, CD/DVD drive and floppy drive (which the host doesn't have) in my case.
To remove such hardware go the player menu, select Removable Devices, highlight a device such as the CD/DVD drive and select settings:

Uncheck Connected (this will disconnect it for the current session) and Connect at Power On (which will stop it from being connected to automatically):

Repeat for the Floppy Drive:

Repeat for the Network Adapter:

You will be informed the Network Adapter is unplugged. Windows XP will now be offline:

Using the VM and Connecting to USB Hardware
So the first thing I'm going to check is the documents and pictures folders. As you can see all documents migrated from the physical machine to the VM after the Upgrade install of the OEM License to an Enterprise/Retail License:


I can open the document in the VM as Microsoft Works has also migrated over successfully:

Now lets check the hardware. I am going to attach the Epson scanner to the OptiPlex 790 running Windows 10 64 Bit and turn it on. Then I am going to Aerosnap the wIndows XP guest VM to the right. I am going to right click the start button on the Windows 10 Host and select Device Manager:

I can see the Epson scanner listed under other Devices. If I right click it and select properties I can see no driver is installed. I could install the Windows 7 driver but I'm not going to do so as it demonstrates that you can connect to hardware even if the Host OS doesn't recognise it. If I right click the scanner and select properties:

I get informed that the device has no driver installed (code 28):

I can now open up the Device Manager in Windows XP by going to start, right clicking computer and selecting properties:

Then selecting Hardware:

Then selecting Device Manager:

I see the scanner on the Windows 10 Host Device Manger but not the Windows XP Guest Device Manager:

In the VM I can go to the Player Menu and then select Removable Devices. I can then highlight my Epson scanner and then left click "connect":

In the Windows XP VM (first time connecting) I will get the found new hardware wizard. As the Windows XP VM already has the drivers installed the hardware gets successfully installed:


The Epson scanner has now disappeared from the Windows 10 Host Device Manager and appeared under Imaging Devices in the Windows XP Guest Device Manager:

Since the scanner is in the Device Manager. I can simply launch the Epson Scan:

I can select Scan:

The Windows XP VM then connects to the scanner via the Host's USB port and scans:

I now have a new scanned image:

The Windows XP Guest and Windows 10 Host have drag and drop capability. These images I have scanned (or data taken from a specialised instrument) can be dragged from the Windows XP Guest VM into any folder on the Windows 10 Host:

They can now be manipulated with modern programs or saved to the World Wide Web:

I will just open one in paint as an example:

I can now save the image:

Of course I can copy the edited file back to the guest VM:

That concludes the USB example:

Using Serial Ports
Make sure your VM is powered down. If you are wanting to add a serial connection to a computer to a computer without a serial port. I advise using the Plugable USB to RS-232 DB9 Serial Adapter (Prolific PL2303HX Rev D Chipset).
https://www.amazon.co.uk/Plugable-Adapter-Prolific-PL2303HX-Chipset/dp/B00425S1H8
http://www.newegg.com/Product/Product.aspx?Item=9SIA2XB12D1318
The driver for these will be obtained automatically from Windows Update on Windows 7 64 Bit and Windows 10 64 Bit. I have two of these plugged into an Inspiron 7347. If I right click and select the start button I can go to the Device Manager:

I can see the Devices listed:

These USB to serial ports work very well with VMware player. Open VMware player. To use Serial Ports go to Player → File → Preferences…:

Select Change Settings:

Accept the User Account Control Prompt:

Then select Enable Virtual Printers and then select ok:

Now highlight your VM and select Edit Virtual Machine Settings:

Select Add…:

Select Serial Port and then select next:

Select Use physical serial port on the host and then select next:

Select the Serial Port you want to Add and select Finish:

Repeat for any other Serial Ports. You should see them listed. Unfortunately a Windows XP VM has COM1 on the virtual machine assigned and as a consequence has assigned Serial Port COM1 on the host to Serial Port COM2 on the guest. This should be amended. In this case COM3 is assigned as COM3 on both the host and guest:

Since these are USB to Serial Ports. Note that we want the VM to use them as Serial Ports and hence for the Host to retain them as USB Devices. Therefore the Serial Ports should be Enabled in the VM (checked) and the USB Devices shouldn't be Enabled (unchecked) in the VM.

The Device Manager should be opened in the VM:

Right click COM1 and select Properties:

Select Port Settings:

Select Advanced:

Now change the COM port number to an unused Port e.g. COM256 and select OK:

You'll need to refresh the Device Manager to make the changes:

Repeat the procedure for COM2 and assign it to COM1. Now the Host COM port designation and Guest COM port designation match which should prevent confusion moreover certain Com ports numbers may need to be designed for your legacy software to interface with the hardware correctly.

You can now control devices by plugging them into the serial/parallel ports of the host PC and by launching the legacy software in the VM in an identical manner to the USB scanner I demonstrated earlier.
